HOW TO download files hosted in Azure Web App in bulk
Here are the steps to download all the site files hosted in an Azure Web App service in bulk for local modifications or cloning to another hosting location -
1. Log in to the Azure portal2. Navigate to your App Service
3. Go to the "Advanced Tools" section
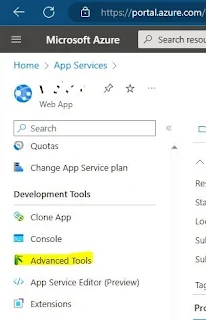
4. Click on "Go" link to launch the Kudu console


5. In the Kudu console, navigate to the "Debug console" and then select "CMD"
Once you are in the command prompt, navigate to the "Site" directory and then to the "wwwroot" directory. Your Web App should be located in a subdirectory of "wwwroot"
6. Click on the Download icon on the left of the label "wwwroot" to download all the files in the Web App as a zipped file.Alternatively, if your web app URL is https://<yourappname>.azurewebsites.net/ insert the word scm after the subdomain name thus -
https://<yourappname>.scm.azurewebsites.net/
This will lead you directly to the Kudu console. Execute the steps above from 5 onwards to download the Web App files in bulk
Using FTP/SFTP
- Obtain FTP/SFTP Credentials: In the Azure Portal, navigate to your Web App and go to "Deployment Center." Look for the FTP/SFTP deployment credentials, and if they are not already set, create a username and password.

- Use an FTP/SFTP Client: Use an FTP/SFTP client like FileZilla or WinSCP on your local computer. Enter the FTP/SFTP server address (usually ftp://<yourappname>.ftp.azurewebsites.net) and the credentials you obtained in the previous step.
- Connect to the Web App: Connect to the Web App using the FTP/SFTP client.
- Navigate to the Files: Once connected, navigate to the "site" or "wwwroot" folder (depending on your Web App's configuration) to access the files hosted in your Web App.
- Download Files: Select the files or folders you want to download, and transfer them to your local computer.


Comments
Post a Comment